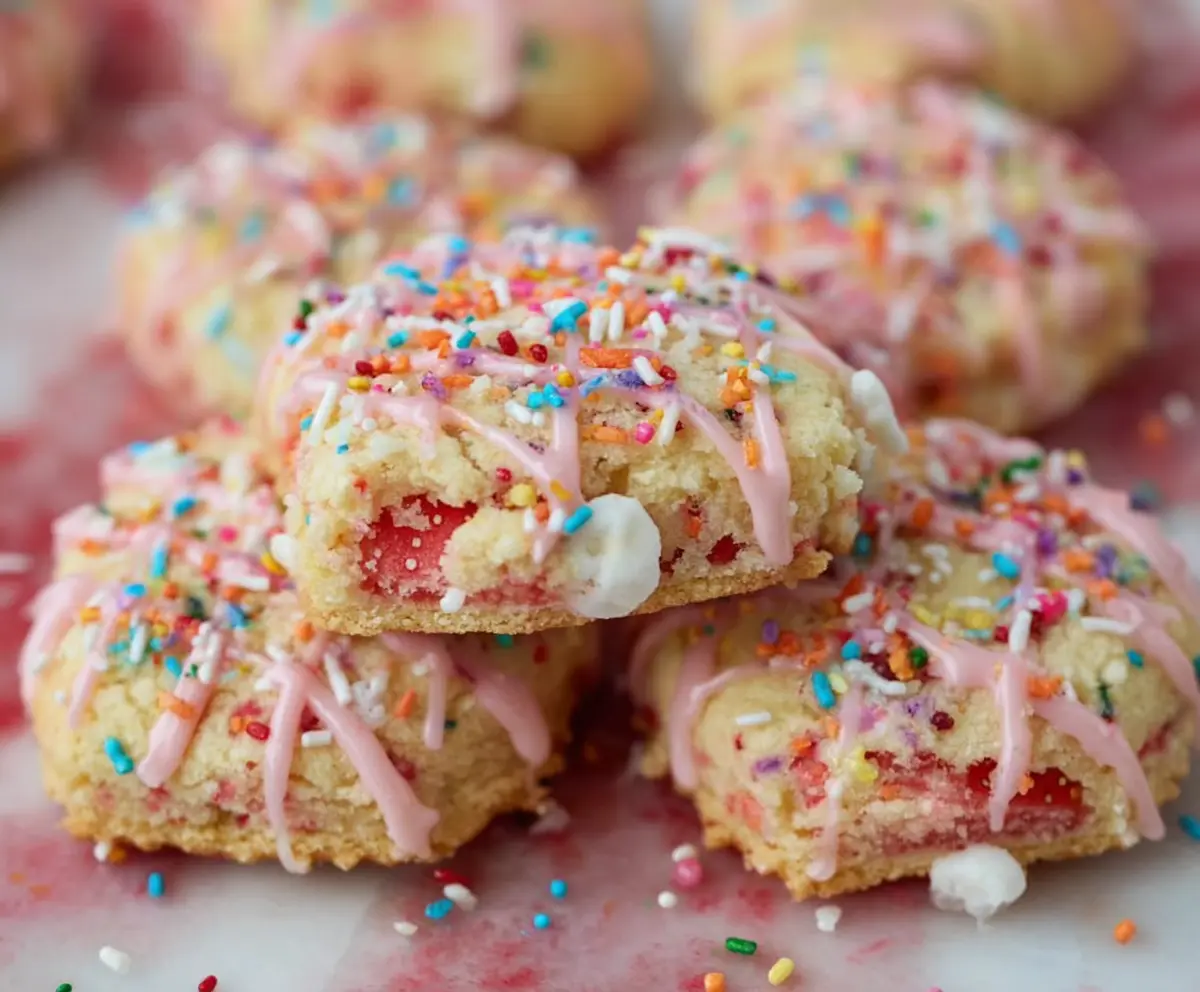
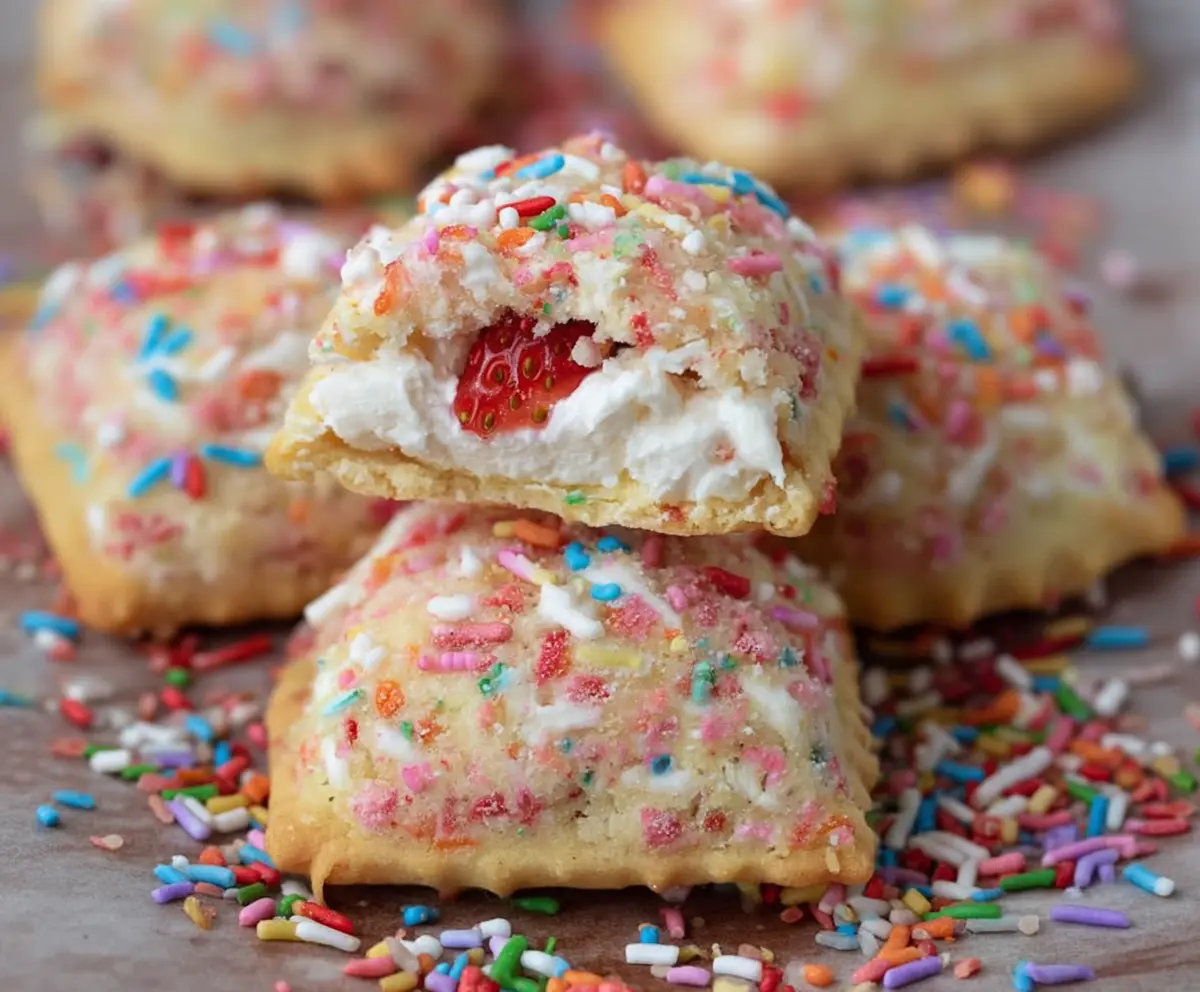
These Strawberry Pop Tart Cookies are a fun twist on the classic snack! Soft cookies filled with sweet strawberry jam and topped with a nice glaze make them perfect for any treat time.
It’s like having your favorite childhood treat but in cookie form! I love enjoying them fresh out of the oven—they’re hard to resist when they’re warm and gooey! 🍓😋
Key Ingredients & Substitutions
Unsalted Butter: Softened butter gives the cookies their rich flavor and tender texture. If you’re dairy-free, you can use coconut oil or a dairy-free butter substitute. Just remember to keep the texture in mind!
Granulated Sugar: This sweetens the cookies and helps with their texture. If you’d like to reduce sugar, consider using a sugar substitute like Stevia, but it might change the cookie’s consistency.
Rainbow Sprinkles: These add color and fun! If you’re looking for a healthier option, try using chopped nuts or dried fruit instead. The topping will change, but it can still be delicious!
Strawberry Jam: You can substitute with other fruit jams like raspberry or blueberry based on your preference. If you want a fresh flavor, use homemade fruit puree!
How Do You Seal Your Cookies to Keep the Jam Inside?
Sealing the cookies properly helps keep that lovely jam from oozing out while baking. Here’s how you can do it:
- Make sure the top layer of dough completely covers the jam without any gaps.
- Gently press down around each jam dollop with your fingers to make sure there’s a tight seal.
- You can use a fork to crimp the edges, giving a nice touch and ensuring it stays sealed during baking.
Taking the time to seal them well makes a big difference in how they turn out, so don’t rush this step!
Strawberry Pop Tart Cookies
Ingredients You’ll Need:
For the Cookie Dough:
- 1 cup (2 sticks) unsalted butter, softened
- 1 cup granulated sugar
- 1 large egg
- 1 teaspoon vanilla extract
- 3 cups all-purpose flour
- 1 teaspoon baking powder
- ½ teaspoon salt
- ½ cup colorful rainbow sprinkles (plus extra for topping)
For the Filling:
- 1 cup strawberry jam or preserves
- Mini marshmallows (optional, for extra pop tart feel)
For the Pink Glaze:
- 1 cup powdered sugar
- 2-3 tablespoons milk
- ½ teaspoon vanilla extract
- Pink food coloring (optional)
How Much Time Will You Need?
This delightful recipe takes about 20 minutes of prep time and 15 minutes of baking time. Don’t forget to let the cookies cool for about 10 minutes before adding the glaze. All in all, you’ll be enjoying these tasty cookies in about an hour!
Step-by-Step Instructions:
1. Preheat Your Oven:
Start by preheating your oven to 350°F (175°C). Line your baking sheets with parchment paper or silicone baking mats to prevent sticking.
2. Cream the Butter and Sugar:
In a large mixing bowl, use an electric mixer to cream together the softened butter and granulated sugar until the mixture is light and fluffy. This usually takes about 2-3 minutes.
3. Add Egg and Vanilla:
Next, beat in the egg and vanilla extract until they are fully combined into the buttery mixture. Mix until smooth.
4. Combine Dry Ingredients:
In a separate bowl, whisk together the flour, baking powder, and salt. This ensures an even distribution of the leavening agent.
5. Mix Wet and Dry Ingredients:
Gradually add the dry mixture to the wet ingredients, mixing until just combined. Avoid overmixing to keep the cookies light.
6. Add Sprinkles:
Gently fold in the colorful rainbow sprinkles with a spatula or wooden spoon, ensuring they are evenly distributed throughout the dough.
7. Roll Out the Dough:
Divide the dough in half. Roll out each half between two sheets of parchment paper to about 1/4-inch thick. This makes it easy to cut out the cookie shapes.
8. Prepare for Filling:
On one rolled out rectangle, place spoonfuls of strawberry jam spaced evenly apart. Leave some space between each dollop for sealing later on.
9. Add Mini Marshmallows (Optional):
If you’re feeling extra indulgent, add a mini marshmallow on top of each dollop of jam for an even gooier filling!
10. Seal the Cookies:
Carefully place the second rolled dough rectangle on top. Gently press around the jam filling to seal the cookies. Make sure there are no gaps! A fork can help crimp the edges.
11. Cut the Cookies:
Using a sharp knife or a cookie cutter, cut the dough into squares or rectangles, mimicking the shape of pop tarts.
12. Bake the Cookies:
Transfer the cut cookies onto the prepared baking sheet. Bake in your preheated oven for 12-15 minutes, or until the edges are lightly golden.
13. Prepare the Pink Glaze:
While the cookies are baking, prepare the glaze. In a small bowl, mix the powdered sugar, milk, vanilla extract, and pink food coloring until you reach your desired consistency.
14. Cool and Glaze:
Once baked, let the cookies cool on a wire rack for about 10 minutes. Drizzle the pink glaze over the cooled cookies and sprinkle with more rainbow sprinkles while the glaze is still wet.
15. Allow to Set:
Let the glaze set completely before enjoying these delightful Strawberry Pop Tart Cookies.
These cookies are perfect for sharing with friends or enjoying as a sweet treat any time of day. Happy baking! 🍓✨
Can I Use Different Flavors of Jam?
Absolutely! While strawberry jam gives that classic flavor, feel free to substitute with raspberry, blueberry, or any fruit jam you love. Just keep in mind that the flavor and color of your cookies will change slightly!
How Do I Store Leftover Cookies?
Store any leftover cookies in an airtight container at room temperature for up to 5 days. If you want to keep them fresh longer, you can refrigerate them for up to a week or freeze them for up to 3 months. Just make sure to separate layers with parchment paper to prevent sticking!
What If My Dough Is Too Sticky to Roll Out?
If your dough is too sticky, try chilling it in the refrigerator for about 30 minutes. This should make it easier to roll out. Alternatively, you can dust your work surface and the dough with a bit of flour to help manage stickiness.
Can I Make These Cookies Gluten-Free?
Yes! To make these cookies gluten-free, substitute the all-purpose flour with a 1:1 gluten-free flour blend. Make sure it contains xanthan gum for proper texture. Follow the rest of the recipe as directed!