These easy homemade dill pickles are crunchy, tangy, and full of flavor! With just cucumbers, dill, garlic, and vinegar, you can make your own tasty pickles right at home.
Making pickles is like a fun little science project. Just mix the ingredients, let them soak, and in a few days, you’ll have yummy treats! I love adding them to sandwiches or snacking straight from the jar. 😋
Key Ingredients & Substitutions
Cucumbers: Use small cucumbers, often called pickling cucumbers. They stay crunchy and absorb flavors better. If you can’t find them, Persian cucumbers can also work.
Garlic: Fresh garlic adds wonderful flavor. Don’t skip it! If you’re in a pinch, you can use garlic powder for a milder taste.
Vinegar: White vinegar is perfect for this recipe, but you can substitute apple cider vinegar if you want a slightly sweeter taste. Just make sure it has 5% acidity for safe pickling.
Dill: Fresh dill plays a crucial role. If unavailable, dried dill can substitute, but use less since it’s more concentrated. I sometimes mix in a bit of dill seed for an interesting twist!
Spices: Feel free to adjust the spices. You can skip the red pepper flakes if you prefer milder pickles. Black mustard seeds can also be a tasty addition.
How Do You Ensure Your Pickles Stay Crunchy?
Staying crunchy is key to great pickles! Here are some tips to keep your pickles firm and crispy:
- Trim the blossom ends of cucumbers to release enzymes that can make them soft.
- Consider adding 1/4 teaspoon of calcium chloride (often sold as Pickle Crisp) to each jar. It helps maintain that crunch.
- Avoid using overripe cucumbers, as they tend to be softer.
Easy Homemade Dill Pickles Recipe for Beginners
Ingredients:
- 4 cups small cucumbers (about 8-10), sliced into spears or rounds
- 4 cloves garlic, peeled and smashed
- 4 cups water
- 2 cups white vinegar (5% acidity)
- 3 tablespoons kosher salt or pickling salt
- 2 tablespoons granulated sugar (optional)
- 4-6 fresh dill sprigs (or 2 tablespoons dried dill)
- 1 teaspoon black peppercorns
- 1/2 teaspoon red pepper flakes (optional for a little heat)
- 2 bay leaves
Time Needed:
This recipe will take you about 20 minutes of prep time. After making the pickles, they will be ready to enjoy in about 48 hours, but they taste even better after 5-7 days of pickling in the refrigerator. Total wait time is around a week for the best flavor!
Step-by-Step Instructions:
1. Prepare the Cucumbers:
Start by washing the cucumbers thoroughly to get rid of any dirt. Slice them into spears or rounds, depending on what you like. Don’t forget to trim off the blossom ends of the cucumbers! This little step helps them stay crunchy and delicious.
2. Make the Brine:
Next, grab a saucepan and mix together the water, white vinegar, kosher salt, and sugar (if you’re using it). Heat this mixture over medium-high heat until it reaches a boil. Stir it up until the salt and sugar dissolve completely, then take it off the heat and let it cool to room temperature.
3. Sterilize the Jars:
While the brine is cooling, it’s time to prepare your jars. Boil your canning jars and lids in water for about 10 minutes to sterilize them. This ensures your pickles stay fresh and yummy!
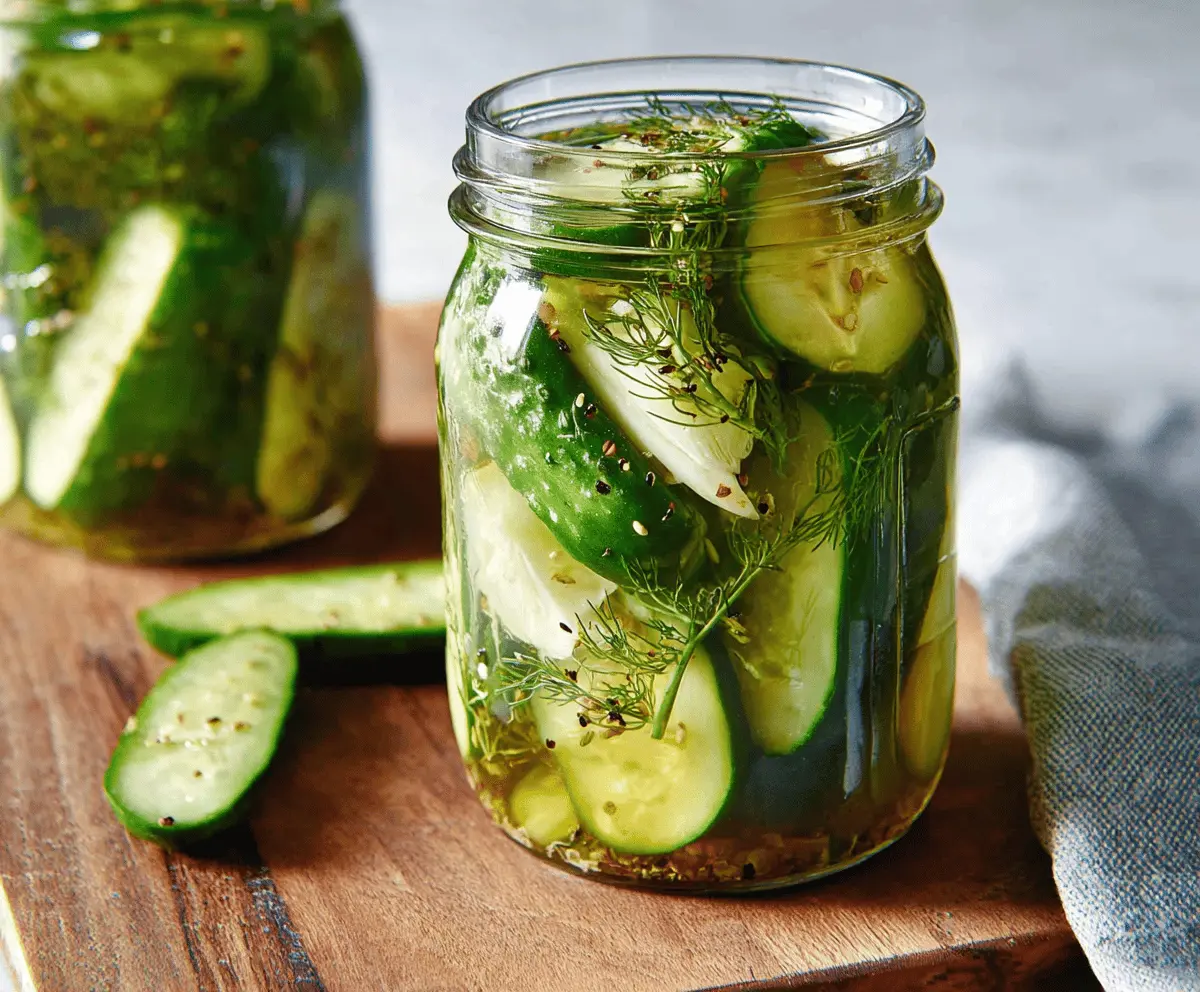
4. Pack the Jars:
Now, it’s time to fill those jars! Place 1-2 dill sprigs, smashed garlic cloves, black peppercorns, red pepper flakes (if you like a little heat), and bay leaves into each jar. Then, pack the cucumber slices or spears snugly inside the jars, making sure not to crush them.
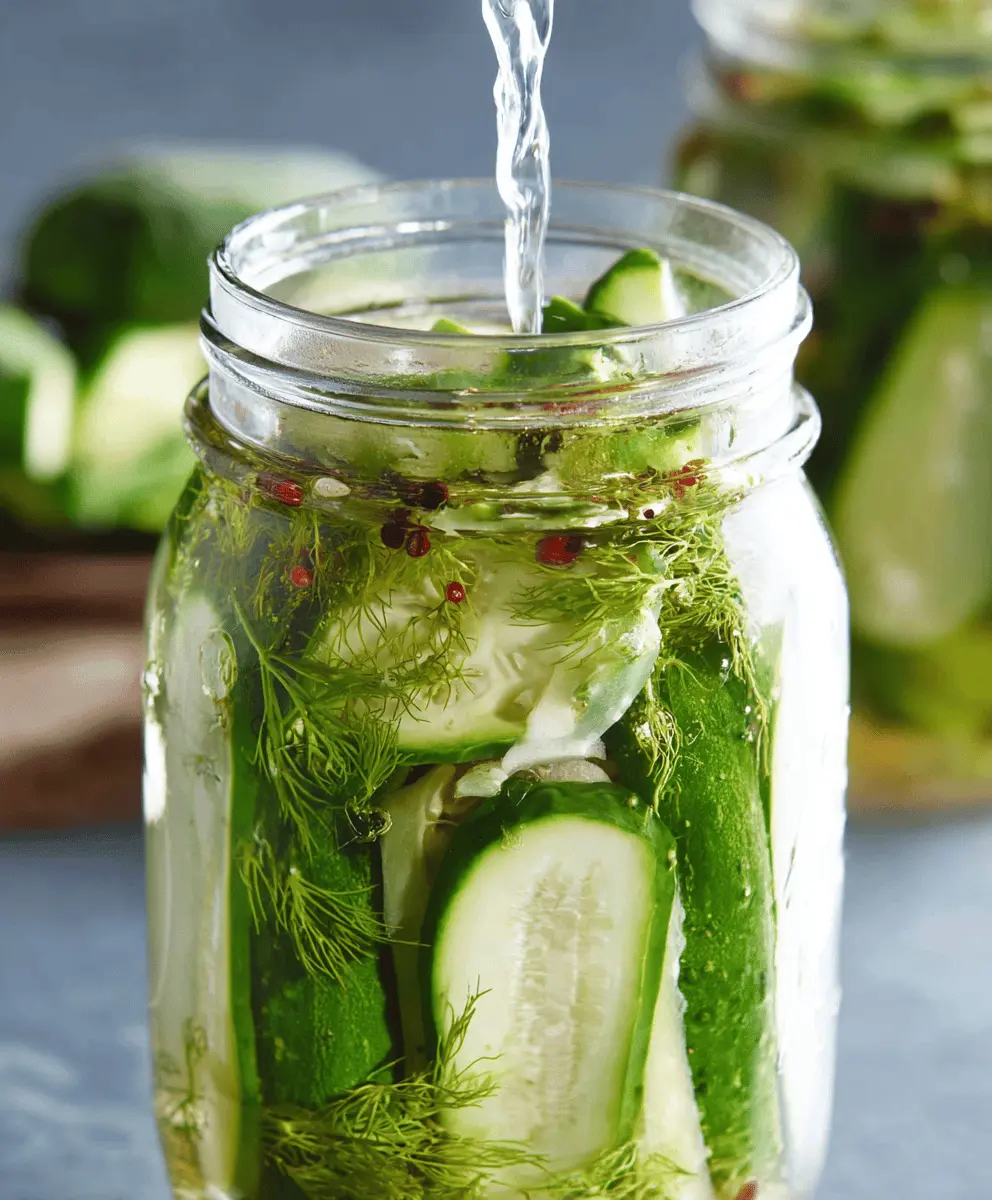
5. Add the Brine:
Pour the cooled brine over the packed cucumbers, filling each jar while leaving about 1/2 inch of space at the top. It’s important that the cucumbers are completely submerged in the brine to ensure they pickle properly!
6. Seal the Jars:
Wipe the rims of the jars with a clean cloth to remove any drips, and then seal the jars with the sterilized lids. Make sure they’re on tight, so nothing leaks out!
7. Pickling Time:
Once everything is sealed, allow the jars to cool down to room temperature. Then, pop them into the refrigerator. Your delicious dill pickles will be ready to enjoy after about 48 hours of pickling, but they taste even better after 5-7 days. The longer they sit, the more flavor they develop!
8. Enjoy:
Store your homemade dill pickles in the refrigerator and enjoy them within 2 months for the best crunch and flavor. They are perfect for snacking, adding to sandwiches, or just about anything you’d like!
These pickles are quick, simple, and a delightful treat for anyone wanting to try their hand at homemade pickling!
Frequently Asked Questions
Can I Use Different Types of Cucumbers?
Yes, while small pickling cucumbers are ideal for their crunchiness, you can also use Persian cucumbers. Just be sure to select firm cucumbers without soft spots for the best results!
How Long Do the Pickles Last in the Refrigerator?
Your homemade dill pickles can last up to 2 months in the refrigerator. For the best flavor and crunch, it’s recommended to consume them within this period.
What Should I Do If My Pickles Float Above the Brine?
If your pickles aren’t fully submerged, you can add a small piece of a clean, non-reactive weight (like a ceramic weight) on top to keep them in the brine. Alternatively, you can also add more brine if needed.
Can I Customize the Recipe with Other Spices or Ingredients?
Absolutely! Feel free to experiment with spices like mustard seeds, coriander seeds, or even slices of jalapeño for heat. Just remember to keep the basic brine ratio the same to ensure proper pickling!