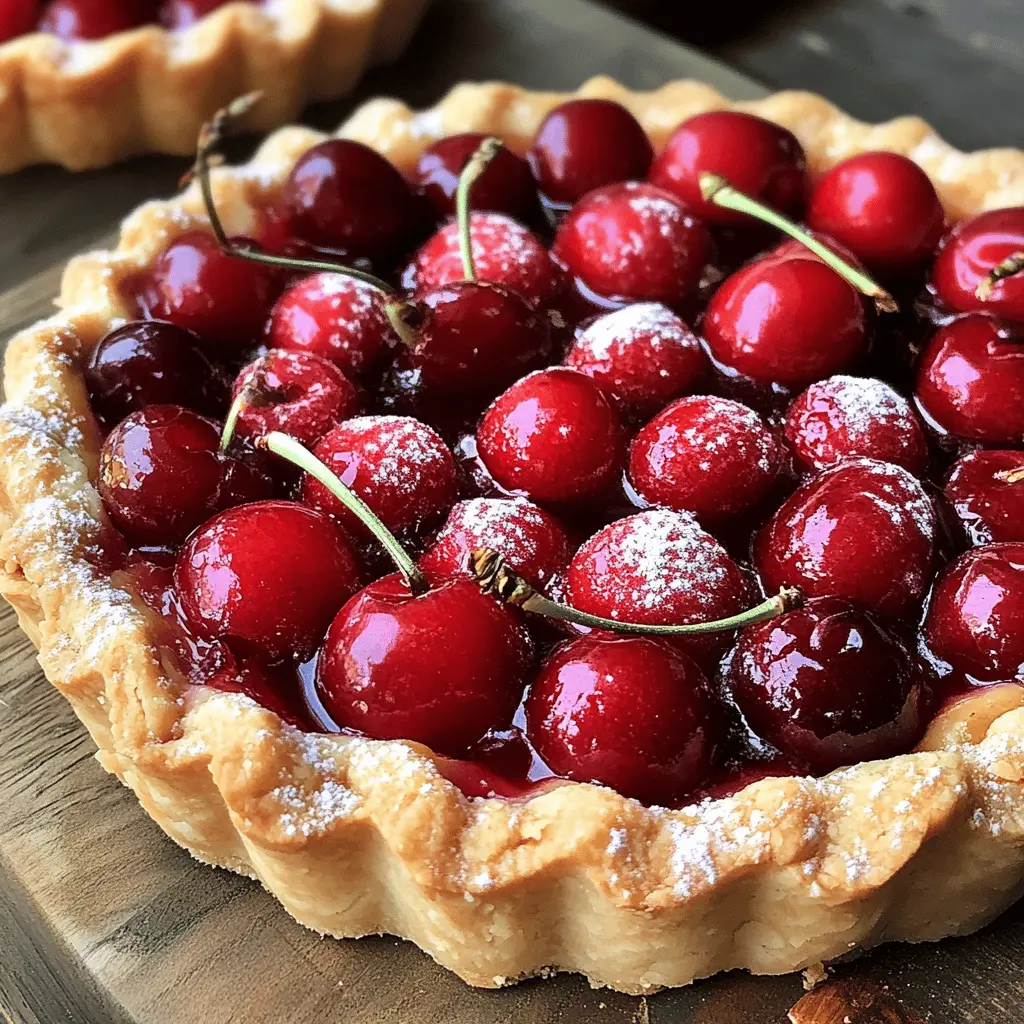
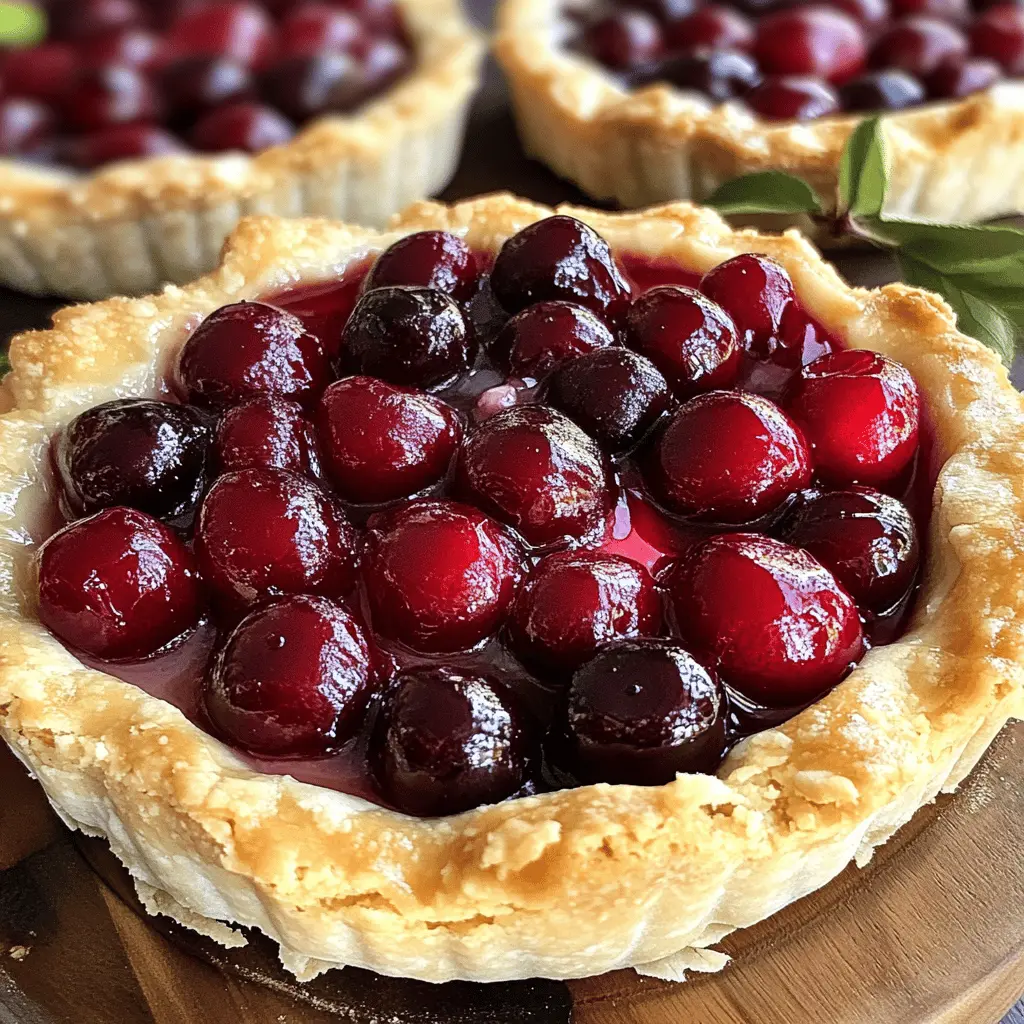
These Rustic Cherry Tarts are a charming treat with a flaky crust and juicy cherry filling. They look beautiful and taste even better, making them perfect for any gathering!
I love how simple they are to make! Just roll out the dough, fill it with sweet cherries, and bake until golden. It’s hard to resist having seconds—who can blame you? 😊
Key Ingredients & Substitutions
Fresh cherries: Use ripe, sweet cherries for the best flavor. If cherries aren’t available, frozen cherries can work too. Just make sure to thaw them and drain excess liquid before mixing.
Granulated sugar: This helps to sweeten your cherry filling. If you’re watching your sugar intake, consider using a sugar substitute like stevia or monk fruit but adjust the amount since they can be sweeter.
Lemon juice: This adds brightness. If you’re out of lemons, a splash of apple cider vinegar or even orange juice can give a nice tartness as well.
Cornstarch: It thickens the cherry filling. If you don’t have cornstarch, you can substitute it with all-purpose flour, using about twice the amount. Just mix it well to avoid clumping!
Refrigerated pie crusts: These save time! If you want homemade, you can make a simple crust with flour, butter, and a little water. Or, for gluten-free options, look for pre-made gluten-free crusts.
How Do You Create the Perfect Rustic Look with Pie Crusts?
A rustic tart is all about charm, so don’t stress too much about precision. The key is the folding technique. After placing the cherry filling, gently fold the edges over—it’s okay if it’s messy! Pleating creates beautiful pockets of crust.
- Start at one edge of the crust, fold over the filling, and pinch to hold. Continue all the way around.
- If using a lattice, cut strips of the second crust and lay them over in a crisscross pattern for a lovely touch.
- Brush the edges with beaten egg for a nice shine. This also helps the sugar stick for a crunchy topping!
How to Make Rustic Cherry Tarts
Ingredients You’ll Need:
For the Cherry Filling:
- 2 cups fresh cherries, pitted and halved
- ½ cup granulated sugar
- 1 tablespoon lemon juice
- 1 tablespoon cornstarch
- 1 teaspoon vanilla extract
- ¼ teaspoon salt
For the Crust:
- 1 package refrigerated pie crusts (2 crusts)
- 1 egg, beaten (for egg wash)
- 2 tablespoons coarse sugar (for topping)
How Much Time Will You Need?
This recipe will take you about 15 minutes to prepare and around 30-35 minutes to bake. Plus, I recommend letting the tarts cool for a few minutes before serving. So, in total, you’re looking at just under an hour for a delicious dessert!
Step-by-Step Instructions:
1. Preheat the Oven:
Start by preheating your oven to 400°F (200°C). This will ensure it’s nice and hot when your tarts are ready to go in!
2. Prepare the Cherry Filling:
In a large bowl, mix together the pitted and halved cherries, granulated sugar, lemon juice, cornstarch, vanilla extract, and salt. Stir gently to coat the cherries evenly, then let this mixture sit for about 10-15 minutes. This gives the cherries time to release some delicious juice!
3. Roll Out the Crust:
On a floured surface, roll out one of the pie crusts. This will be the bottom of your tart. Place it on a baking sheet lined with parchment paper to prevent sticking.
4. Assemble the Tart:
Spoon the cherry filling into the center of the crust, making sure to leave about a 2-inch border around the edges. This will give you some nice crust to fold over!
5. Fold the Edges:
Gently fold the edges of the crust over the cherry filling. Don’t worry about it being perfect—just pleat it as you go for that rustic look! The center should remain open for everyone to see the yummy cherries!
6. Add a Lattice Top (Optional):
If you’d like a fancy touch, roll out the second pie crust and cut it into strips to create a lattice pattern over the cherry filling. If you prefer it simpler, just leave it as is. It will still be delicious!
7. Brush and Sprinkle:
Using a brush, coat the edges of the crust with the beaten egg to give it a nice golden color when baked. Then, sprinkle the coarse sugar over the top of the tart for some extra sweetness and crunch.
8. Bake:
Place your tart in the preheated oven and bake for 30-35 minutes. You’ll know it’s ready when the crust is golden brown and the cherry filling is bubbling.
9. Cool and Serve:
Let the tart cool slightly before serving. It’s especially nice served warm, maybe with a scoop of vanilla ice cream on top. Enjoy your delicious rustic cherry tarts!
Can I Use Frozen Cherries Instead of Fresh?
Yes, frozen cherries work well in this recipe! Just make sure to thaw them completely and drain any excess liquid to avoid a soggy tart. You may want to adjust the sugar slightly since frozen cherries can be a bit sweeter.
What If I Don’t Have Cornstarch?
No problem! You can substitute with all-purpose flour in a pinch. Use about 1.5 tablespoons of flour instead of the tablespoon of cornstarch. Just keep in mind that the filling might be a bit less thick.
How Should I Store Leftovers?
Store any leftovers in an airtight container in the fridge for up to 3 days. To enjoy the tart warm again, simply reheat it in the oven at 350°F (175°C) for about 10-15 minutes. This will help crisp up the crust again!
Can I Make the Tart Ahead of Time?
Yes, you can prepare the tart ahead of time! Assemble it without baking, cover it with plastic wrap, and refrigerate for up to a day. When ready to bake, simply remove from the fridge, brush with egg wash, and bake as directed. Enjoy the freshly baked goodness!